How To Customize Cups Using The Full Wrap Template
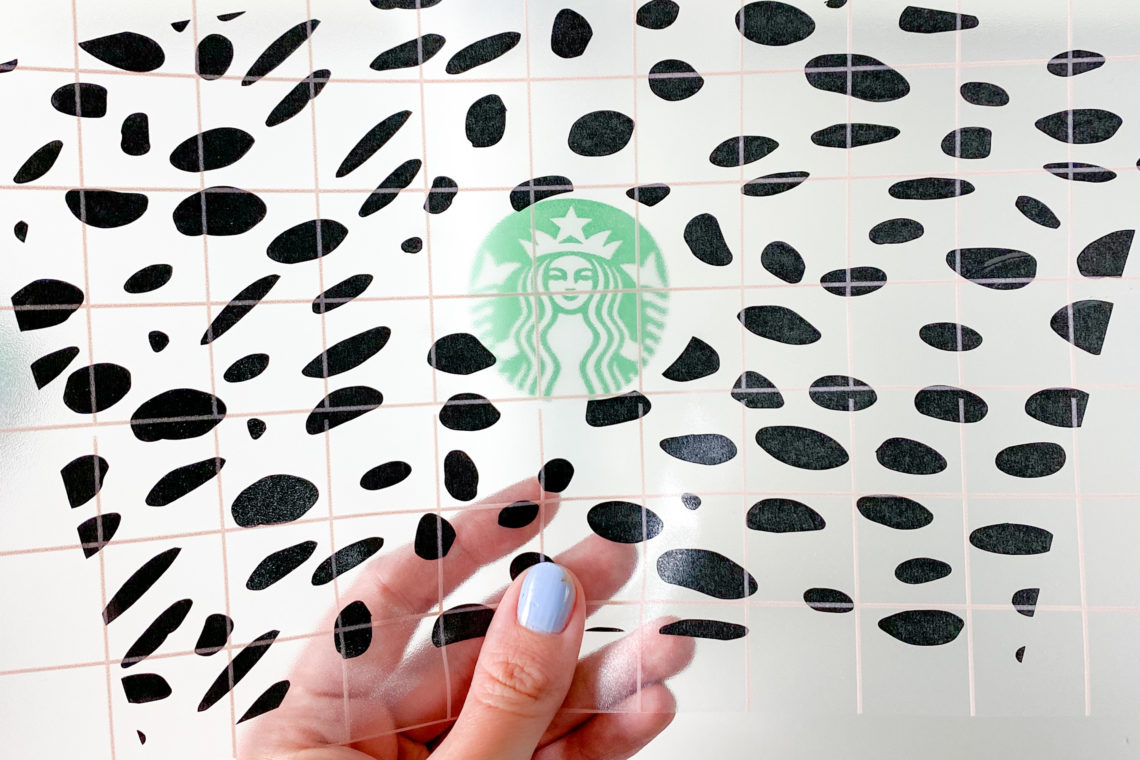
I cannot tell you how many requests I’ve gotten for a full cup wrap template in the last few months! This weekend I finally had enough time to sit down and create one. If you haven’t downloaded it yet, you can grab it here and then keep reading as I walk you through the steps of creating your own designs using the template.
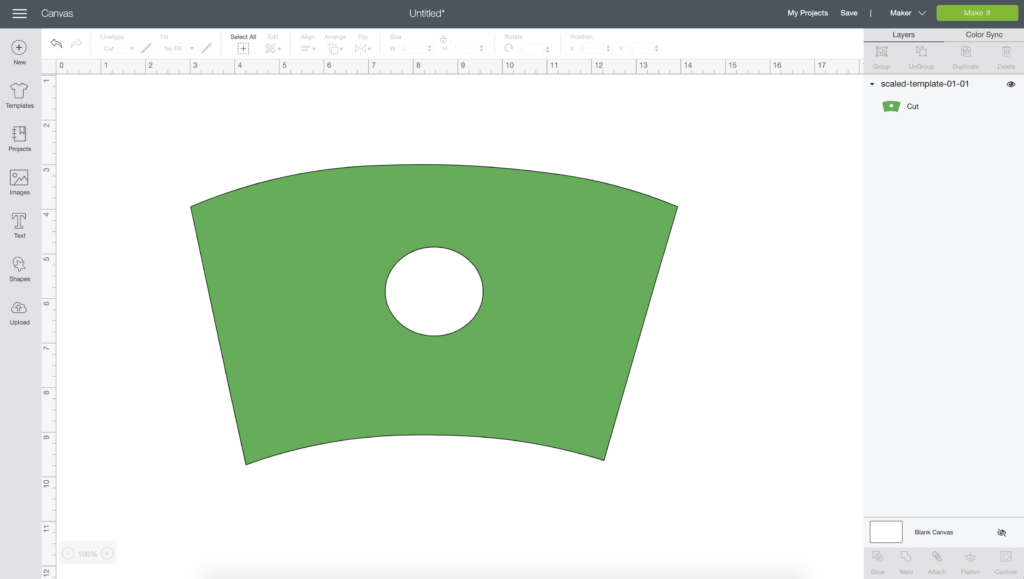
Upload Design
When you upload and open the design onto the canvas, it will already be scaled to fit the cup so you won’t need to adjust the sizing at all.
Slice
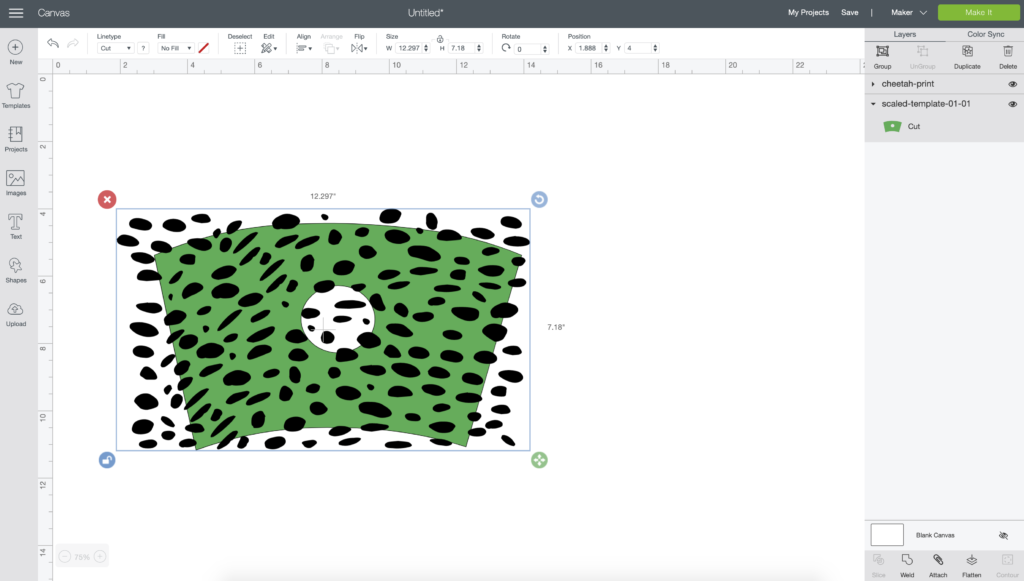
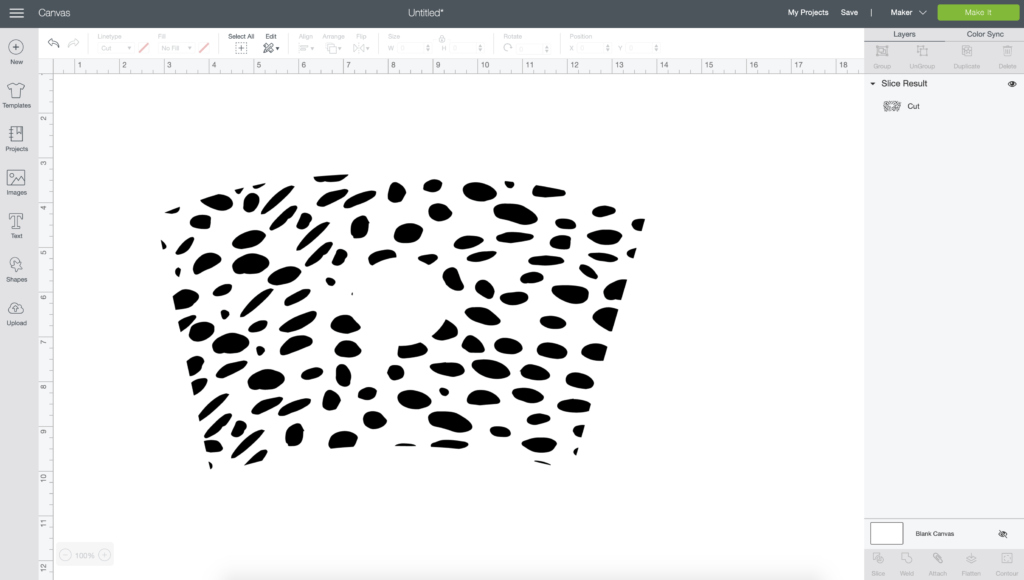
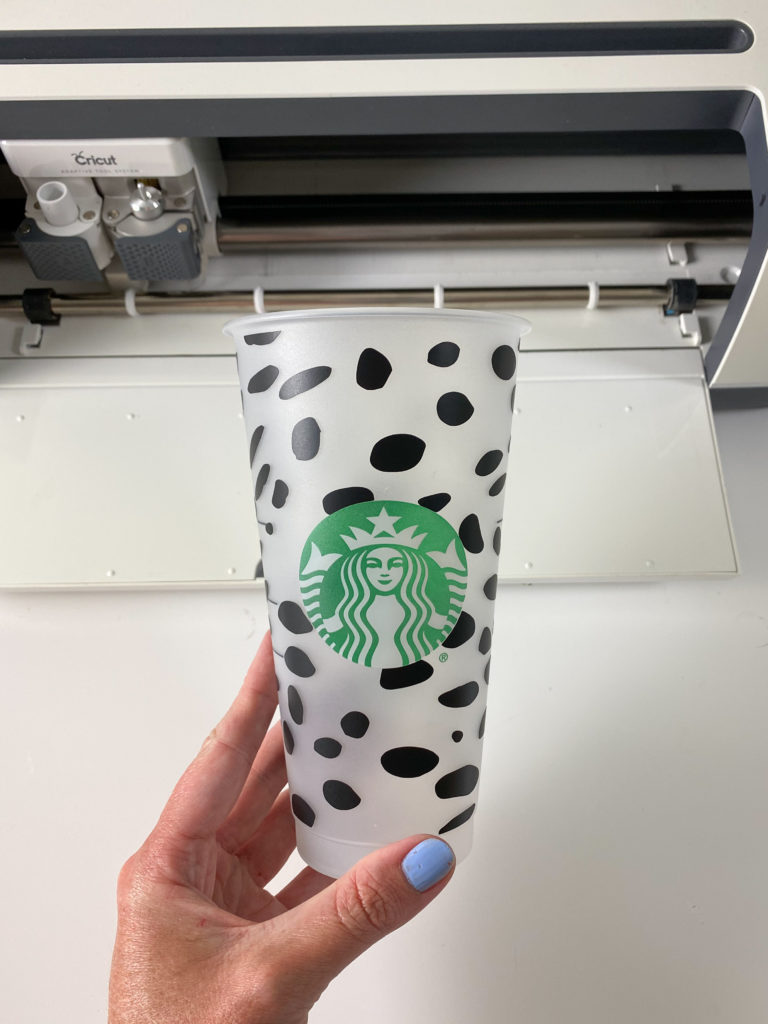
Next, open up the file that you want to use on your cup. I’m using this Dalmatian print as an example. Scale the print and place it over the template to create the look you want. Select both the template and the pattern and then click the slice button in the bottom right.
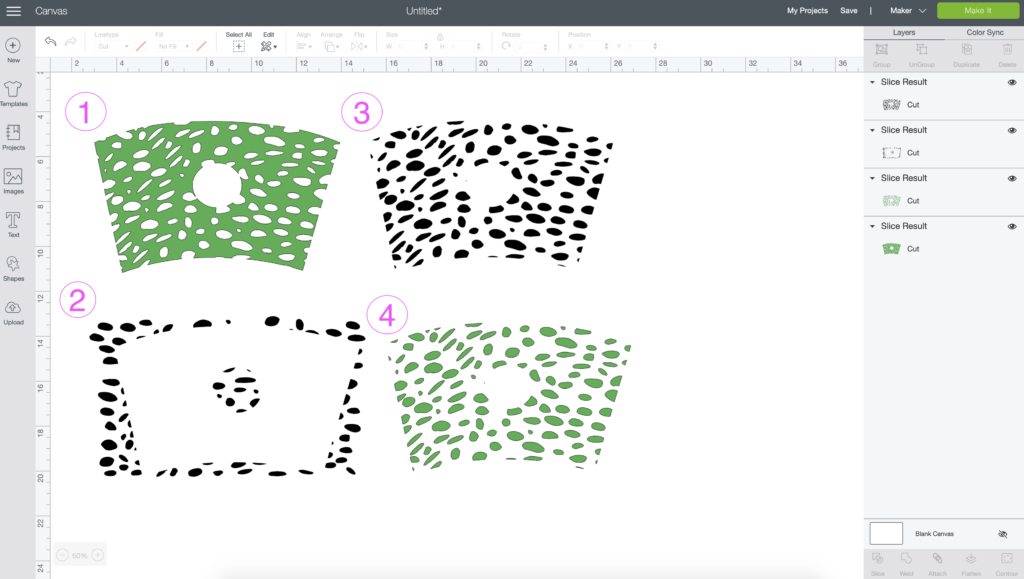
After slicing you’ll be left with several images. You’ll have (1) the template background with the shapes removed, (2) the excess shapes from around the template and then (3 and 4) two template shaped Dalmatian print designs. You can delete everything except one of the template shaped prints.
Cut
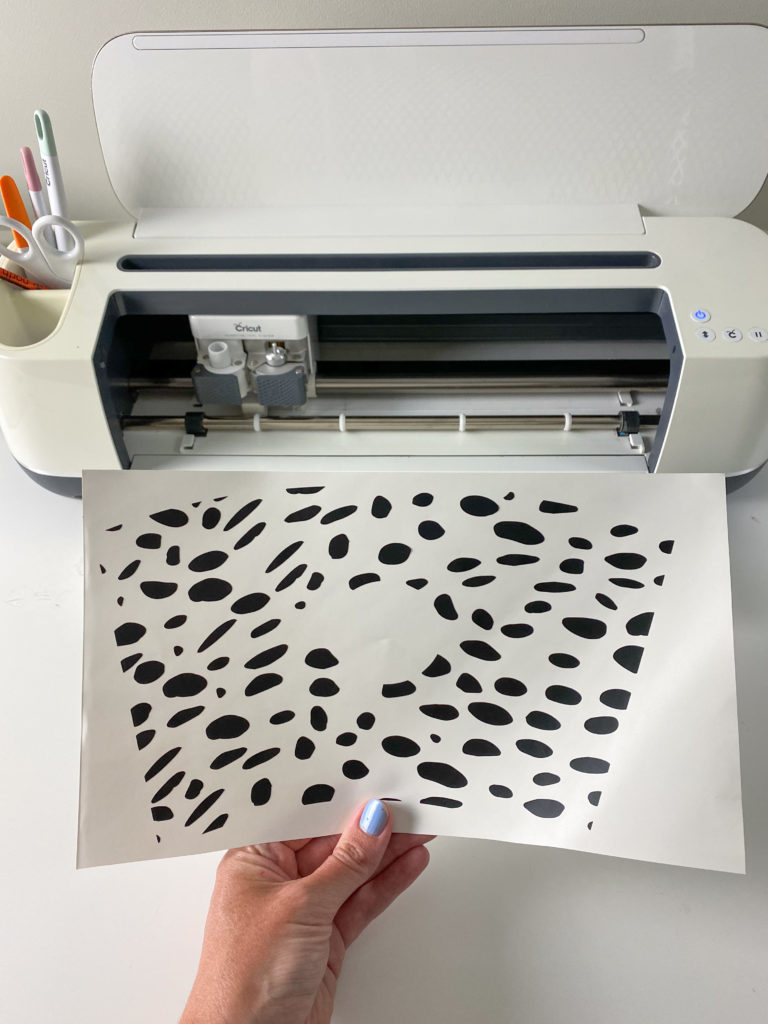
Since it’s already scaled to size, all you need to do now is click make it and cut the design out of permanent vinyl.
Once the design is cut you can weed away the excess vinyl and apply it to the cup all at once.
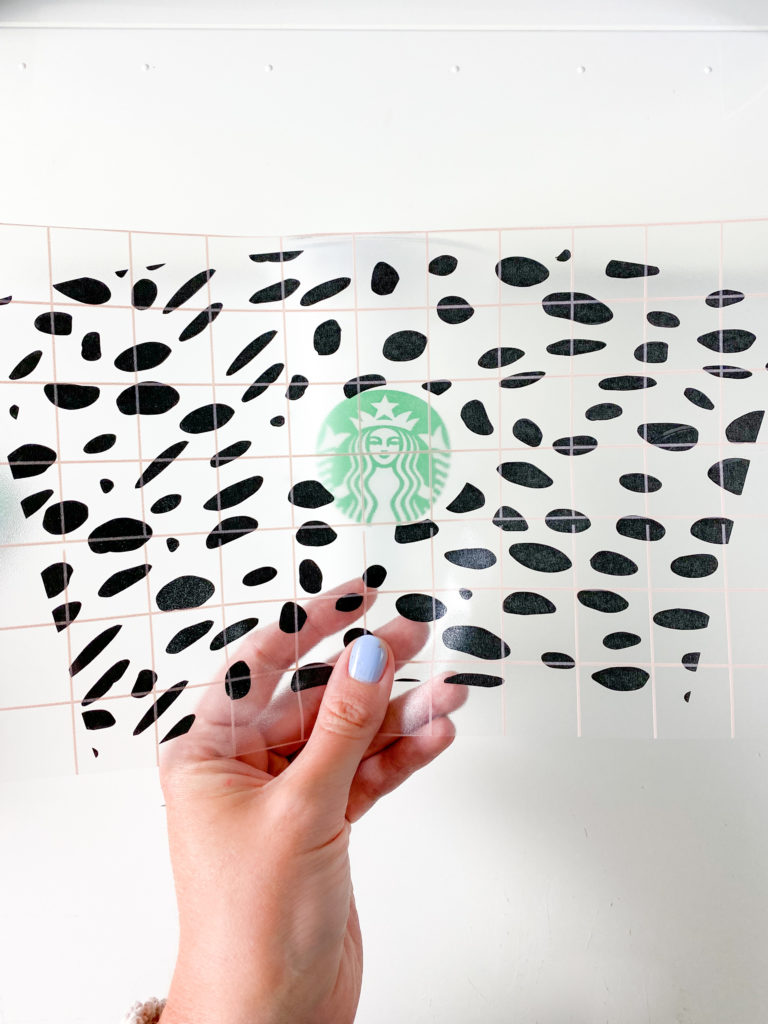
SO much easier than placing 100 spots on the cup one by one!
Just align the circle cutout over the logo on the cup and wrap it around starting from the center and pressing outward as you go.
Then remove the transfer tape!
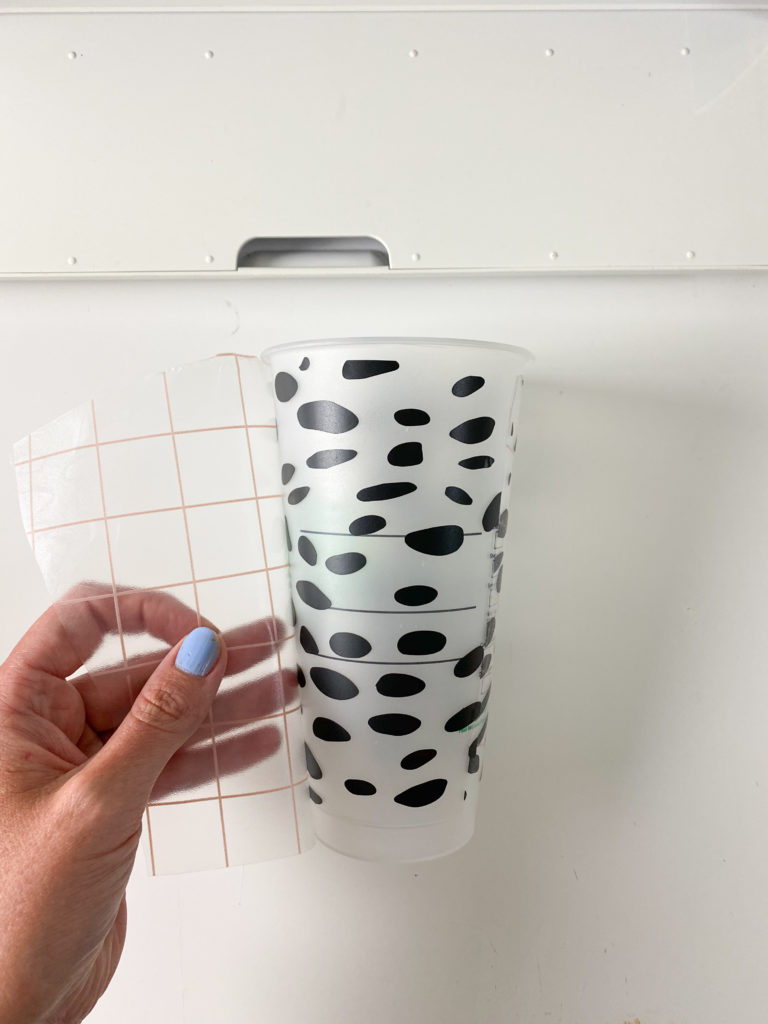
This cup took me less than 5 minutes to create from start to finish! The full wrap template is such a huge timesaver!
As always, if you create something cool I’d love for you to tag me on IG or send me an email! If you have any questions drop a comment below. 🙂
Happy crafting!




Yuribel
Hi Kayla first of thank you for all the free download, but please I need a video I have to see it to understand it.
Roxi Bugher
Hi Kayla i welded it and it worked. Would you be able to create a wrap around for the cold cups without taking the circle out for other cold cups?
Kayla
Of course!!
Tammie
thank you you amaze me!
just wondering what transfer tape you use.
I got some oratape application tape MT80P ans it just doesn’t pick up my project at all and Cricut is too sticky!! please help!!
Kayla
Hey! I only use two kinds, the clear one from Expressions Vinyl and the gridded tape from Shop Craftables! Both are great!
Michelle
Thank you so much! ☺️
Kayla
You’re so welcome!!
Teresa
Hello Kayla, Thank you so much for this template. This template is better then buying it and now I can any design I want to add.
Thank you for all your hard work and Thank you so much for showing us how to do it and Thank you for sharing your work with everyone 😊
Kayla
Thank YOU!! Appreciate your kind words so much! <3
Tammie
thank you for getting back to me about the Transfer tape !!
Kayla
You’re welcome!!
Hanna
I attempted to follow these instructions for this cup with both of the downloads provided and was not able to get them to slice.. When placing the spots over the full cup template and selecting them both to slice, I am unable to slice them. Any ways around this or am I do something wrong? I am very grateful for the full cup template!
Kayla
Hey! It could be because the spots aren’t welded together. You can only slice two layers at a time so if your design is just “grouped” and not welded the software will read it as being multiple layers. Try welding the spots first and then place them over the template and slice. Let me know if it still doesn’t work!
Roxy
Thanks for this awesome tutorial!
Do the free downloads come with a commercial license? 😊
Kayla
You are welcome to use them commercially!
Vanessa
Thank you your amazing, Can you help though im stuck, how can i slice when using an iphone? Please and thank you. Also how can i find you on instagram? Im so happy i found you honestly i thought I’d never learn but i found you and im so grateful with how you explain every detail. 🙏🏻
Kayla
Hey! I’ll take a screen recording and share it with you on instagram! My username is Kayla_made, just send me a message so I know it’s you!
Hanna
Thank you! It worked II am not sure why I didn’t think of that first! Thanks again.
Kayla
I love your black lives matter template.. can you do one that says black fathers matter for Father’s Day ?
Ana
Kayla, you so much for your hard work and making these templates available.
Kayla
Thank you so much! Happy you like them!
Nelly
I’m new to the whole cricut world I got it on the first time thank you so much.!!💛
Kayla
Welcome! Happy to have you here!!
TABITHA SALVADOR
THIS HELPED ME SO MUCH!! IM STILL NEW AT THIS SO I LOVE LEARNING THINHS AND YOUR STEP BY STEP DEF HELPED!!!
Kayla
I’m so happy to hear that!! You’ll be a pro in no time!
Valarie
Hi Kayla,
You do amazing work! I was wondering if you have a Los Angeles Lakers round Starbucks template?
Kayla
I’ll add one right now!
Michelle Arellano
Hi, Thank you for this. I am definitely making myself a cup. Do you happen to have a Basketball mom design?
Kayla
I can add one!
Joy
Hi! since I have a silhouette I cannot do sag files are you able to make a png file of this? Thank you!
Valarie Baez
Thank you!
Kayla
No problem! Enjoy!
Paula
Hey Kayla. Totoally new to Cricut, but its been a blast. My question is can this same design also be used for hot cups? Or would the sizing be different?
Kayla
Hey! The sizing would be different for the hot cups. I’ll work on creating the right sized template for those.
Kate Elyss
Hi, Kayla! First off, love your website and all your designs! I’m new to the Cricut world and I am so glad I stumbled across your page on TikTok! Though I am trying to do the full wrap template as practice, but it’s saying the dimensions are too large and to reduce it. Do you mind sharing the dimensions of the full wrap? Thanks in advance!!!
Kayla
Hey! It should be W 10.944 H 6.75
Anne
Hi Kayla,
I just want to let you know you inspired me to get a Cricut Maker – I was on the fence with the Cameo or the Maker and I felt you gave a very unbiased opinion.
I do have a question about the Cricut Press- Is it essential< or do you think an off brand would work? Again thank you for your wealth of information and all the sharig you do!!
Anne
Amanda Zayas
Is that dimintion above for cold up? I sent a prior email for SVG trouble and I found a work around and was able to get the file, but the demtions are not to size. Do you have a PNG file? I know the Cameo opens SVG files so not sure what is happening but I do see when I save your file it keeps at as Html file so when you click it opens in a browser. That is happening with any of your SVG files.
Thanks for your help.
Amanda
Kayla
Hey! I did upload the .png version for silhouette users! Silhouette Studio only supports SVG files in the business or designer versions. The wraps should open to the correct dimensions but the circle decals will not.
Natalie Lukachyk
well today was my lucky day, to have found you & all your awesome stuff!
Thank you
Kayla
Thank you!!
krystal
do you have the dimensions for the circle decals for silhouette users?
Kayla
the dimensions will be the same! W 3.711 x H 3.367 🙂
Hayley Munoz
Hi I downloaded your template but when I opened it in my Cricut design space it appeared small and when the machine printed it, it was very small as well. Can you tell me what am I doing wrong or the right dimensions, thank you!
Kayla
Hey! It should’ve opened into the exact dimensions. Make sure you downloaded the SVG and not the PNG version. But the dimensions should be 10.944×6.75
Nayeli Garcia
Hello & thank you for all the free downloads 😊. I am having trouble figuring the size of the full wrap leopard print to fit around Starbucks cold cup logo. When I upload it’s small & doesn’t fit the Starbucks logo. Can you help me with that? Thank you in advance 💜
Kayla
Hey! It should be W 10.944 and H 6.75
Natachaa Huset
Thank you for sharing! I made a full wrap design but the dimensions 10.944×6.75 are still to big? Would you know what I’m doing wrong?
Kayla
Hey! Are you using a Starbucks cold cup?
Julia M
Hello I have a question when you remove the extra slices the dimensions are slightly different On the slices is that ok or do we adjust to the 6.75x 10.944?
Kayla
Yes, it works best if you readjust the size to the original dimensions.
Julia M
Ok. Thank you!!!
Samantha E
will this template work with lines or stipes?
Kayla
Good question! I’ll try it and get back to you.
grace
Thank you for this. When I tried it its says it doesn’t work for the cricut explore 🙁
Kayla
Hey! I had someone else with the same problem which is so weird bc I have the explore as well and it works fine. Did you download the .png or SVG version of the file?
Victoria
Hi! Where did you find the Dalmatian print??
Thanks so much for this tutorial!
Kayla
Hey! The Dalmatian print is on the free downloads page!
cheryl
This is so great your amazing for sharing. xoxo
Francesca Miller
Hi Kayla I wanted to know what should I do when the cricut design space is saying the image I have is to large to print? It is not letting me go past 6.75 x 9.25
Kayla
Hey! Unfortunately that is as large as you can print from design space. 🙁
Jennifer
HELLO,
Just one question what size is the circle of the Starbucks logo? thank you very much appreciated.
Kayla
Hey! The actual logo on the cup is 2.5×2 inches.
Melissa
Hi! I’m having a hard time customizing the Starbucks logo to say on the top part “ LIVE IN” and the bottom “GRATITUDE” I can’t get the LIVE IN to space out and to save as a whole can you help me create it?
Ashley Bartels
HI! Thank you so much for your free designs it is to appreciated! I am a Silhouette user and when I upload it into Silhouette Studio it doesn’t come up as the size should be. What are the dimensions to use on the cup? THANK YOU
Kayla
10.944 x 6.75
KristieLynn
You do amazing work! Is this file for the 16 or 20oz cold cup?
Kayla
I think it’s 24?
Espie
Hi! I’m having trouble with slicing both the print and the image, it isnt allowing me to slice do i need to weld the print together first?
Kayla
Yes! Weld the print then you can slice. It will only allow you to slice 2 layers at a time.
Manuel Arellano
Any templates for a full wrap of the Starbucks BOTTLES? Pleeeeease help if possible!
Kayla
Hey! I don’t have one on hand, do you know the dimensions?
Ellie
hi my cricut is saying that the dimensions are too big do you know how i would be able to fix it to where it cuts it as is?
Kayla
Hey! It definitely shouldn’t do that. The dimensions should be 10.944 X 6.75
Melissa
hi, do you have any palm tree svg? like how you have the little palm trees in the logo ” Sunshine Tan lines” I was looking for a match svg of that palm tree to add around to the cup? Thank you
Patti
Thank you Kayla…your directions are great and your creations are so cute! I am very new to this Cricut world..and not very crafty! I started to attempt to make this and got as far as loading the wrap..haha. These may sound like silly questions, but here goes anyway! Where do you get the overlay (like the dalmation print that you used, and do I purchase the cups directly from Starucks? Any help is appreciated, and thank you again!
Kayla
Hi Patti, not silly questions at all! The Dalmatian and leopard print overlays are both free downloads on my site. If you’re looking for a different pattern you can always try googling! Yes, the starbucks cups are sold at starbucks locations.
Jules
I was so confused how to make these template so I appreciate you sharing these with everyone on top of the free downloads!! Thank you so much!
Tiffany
A newbie to Cricut and wow this is so helpful can’t wait to print one tomorrow thank you.
Denise
It’s beyond sweet of you to share this! Thank you!
monica
Hello THANKS
a silly question where you by your Starbucks cup just in the corner store your friendly Starbucks or it’s a website where can i buy them?
Kayla
I do buy them at my local Starbucks locations! I haven’t found a place to buy them in bulk.
monica
One more question 🙂
any gamers logo???? everyone in my family are gamers or grandpa i didn’t see it
monica
Thanks I checked like i Starbucks around me today and i found one store i bought 10 🙂 i’ll start family asked already for them 🙂
Tene Jones
Thank you so much, there ate very few people willing to share for free. Not only are you beautiful in the pics but I feel your spirit is just as beautiful you have a blessed day young lady
Viridiana
what am I doing wrong??What can’t I slice it!. I try to select both images but after that I can’t slice?
Kayla
You may need to weld the image that you are trying to slice out of the wrap.
Iliana
Hi! Thank you for the template! What if you wanted to use multiple colors? How to I cut and apply? For example the Christmas one you posted with all is the words. I would need to have multiple cuts and then layer?
Melissa
I am new to this site and absolutely love it!!! i just a wrap for the first time and this template made it so easy. Thank you so much, you are a life saver.
Laura Graham
Thank you so much for this! It was extremely helpful for this cricut newbie!!
Elliotte Foster
hey, you are so good at doing this stuff i was just wondering where do you get the prints?
Miss Cuz Y Not Creations
You are amazing first of all. Second thank you so much for all the free files. And knowledge to learn. I heard of you off someone on tiktok! So glad i found you. Been trying to make my own wraps, but can NEVER get the sizing right haha. Thank you again
Proxies For Youtube
Exactly what I was looking for, thanks for posting.