
Software Tutorial: How To Use Print Then Cut In Design Space

Hey crafty friends, Kayla here and today I’m going to show you how to utilize Cricut’s print then cut feature in Design Space. Print then cut is really as simple as the name implies. You print an image using your household printer then load that image into the Cricut machine where it will read the registration marks and perfectly cut it out.
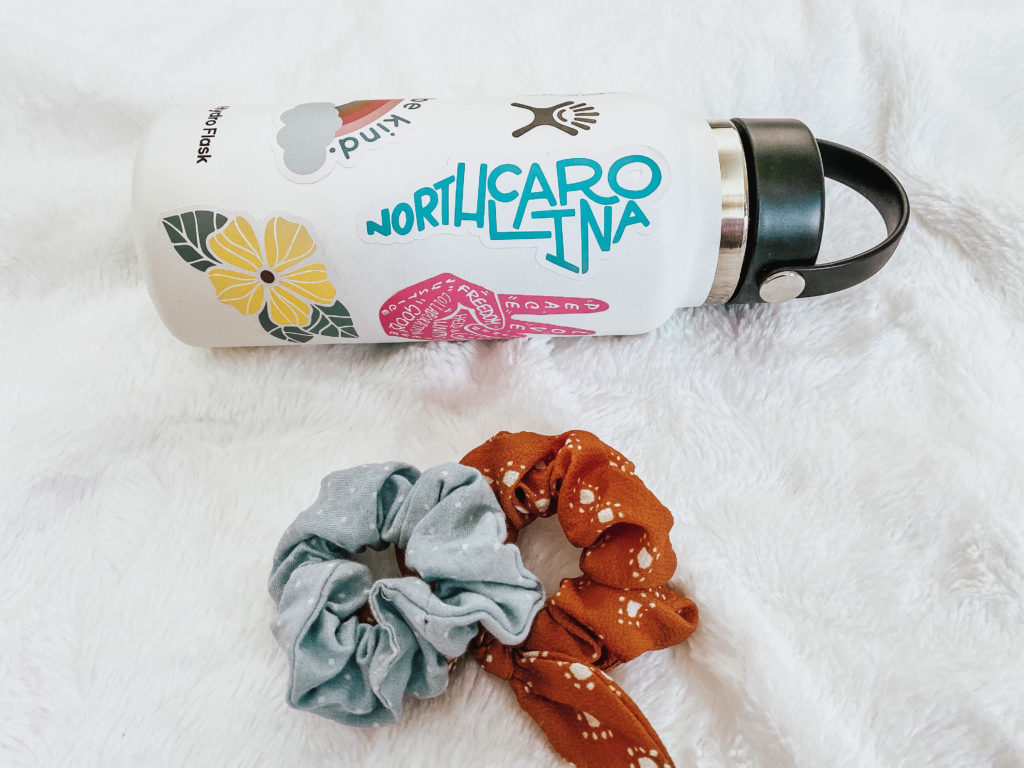
For this tutorial I’m working with Inkjet Printable Adhesive Vinyl to create decals for a water bottle but these same steps will apply to whatever media you use.

Estimated Time To Complete: 20 Mins (easy)
Supplies:
- Inkjet Printable Adhesive Vinyl
- Inkjet Printer
- Cutting Mat
- Cricut Maker
- Blank Water Bottle
Step One: Design Set Up

Start by opening up the designs you plan to use or by uploading your own images into Design Space. In the fill window set each design to print. Most designs are set to cut by default so it’s necessary to change the fill type so the software knows to first print the image. Then, scale the images to fit your project.
*To learn how to upload your own images and save them as printable designs check out this post: How To Use Inkjet Printable Vinyl.

After clicking the make it button you’ll see the images on the screen as well as a black box around them. This is the registration box, the machine will use this box to determine exactly where to cut.
In the print setup window you can choose the number of copies to print as well as choose whether or not you want to print with an added bleed. Adding a bleed helps to ensure a clean edge with no white border.

Lastly, you can choose to use your printers system dialog which is where you can set the print quality, media type etc. For really clean images I set the media type to photo paper and drag the quality slider all the way up to best.
Place the printable vinyl in the printer according to your printers feed directions and print the images.

Once the sheet has finished printing place it on the cutting mat with the printed side facing up.

In the cut settings window select printable vinyl as the material and double check all of the cut settings.
Step Two: Cut Images

Load the cutting mat into the machine and press the start button. The machine will read the registration marks (black box around the images) and cut around the edges of the designs.
Step Three: Weed

Starting at the corner, peel away and discard the excess vinyl from around the cut images. You can see in the photo above how nice and clean the cut lines are!
Step Four: Apply Decals

Now you can simply peel up the decals and apply them to your project.

For this project you can just peel and apply the decals to your water bottle. Use your fingers to remove any creases or bubbles.

Craftables Inkjet Printable Vinyl is water resistant but it’s best to hand wash the bottle and refrain from scrubbing directly on the decals.

These would also make a great gift! You could personalize it for a college student by adding their university logo or mascot.

Of course, if you have any questions- leave a comment down below!


