Give New Life To A Kitchen Aid Mixer Using Printable Vinyl and Cricut
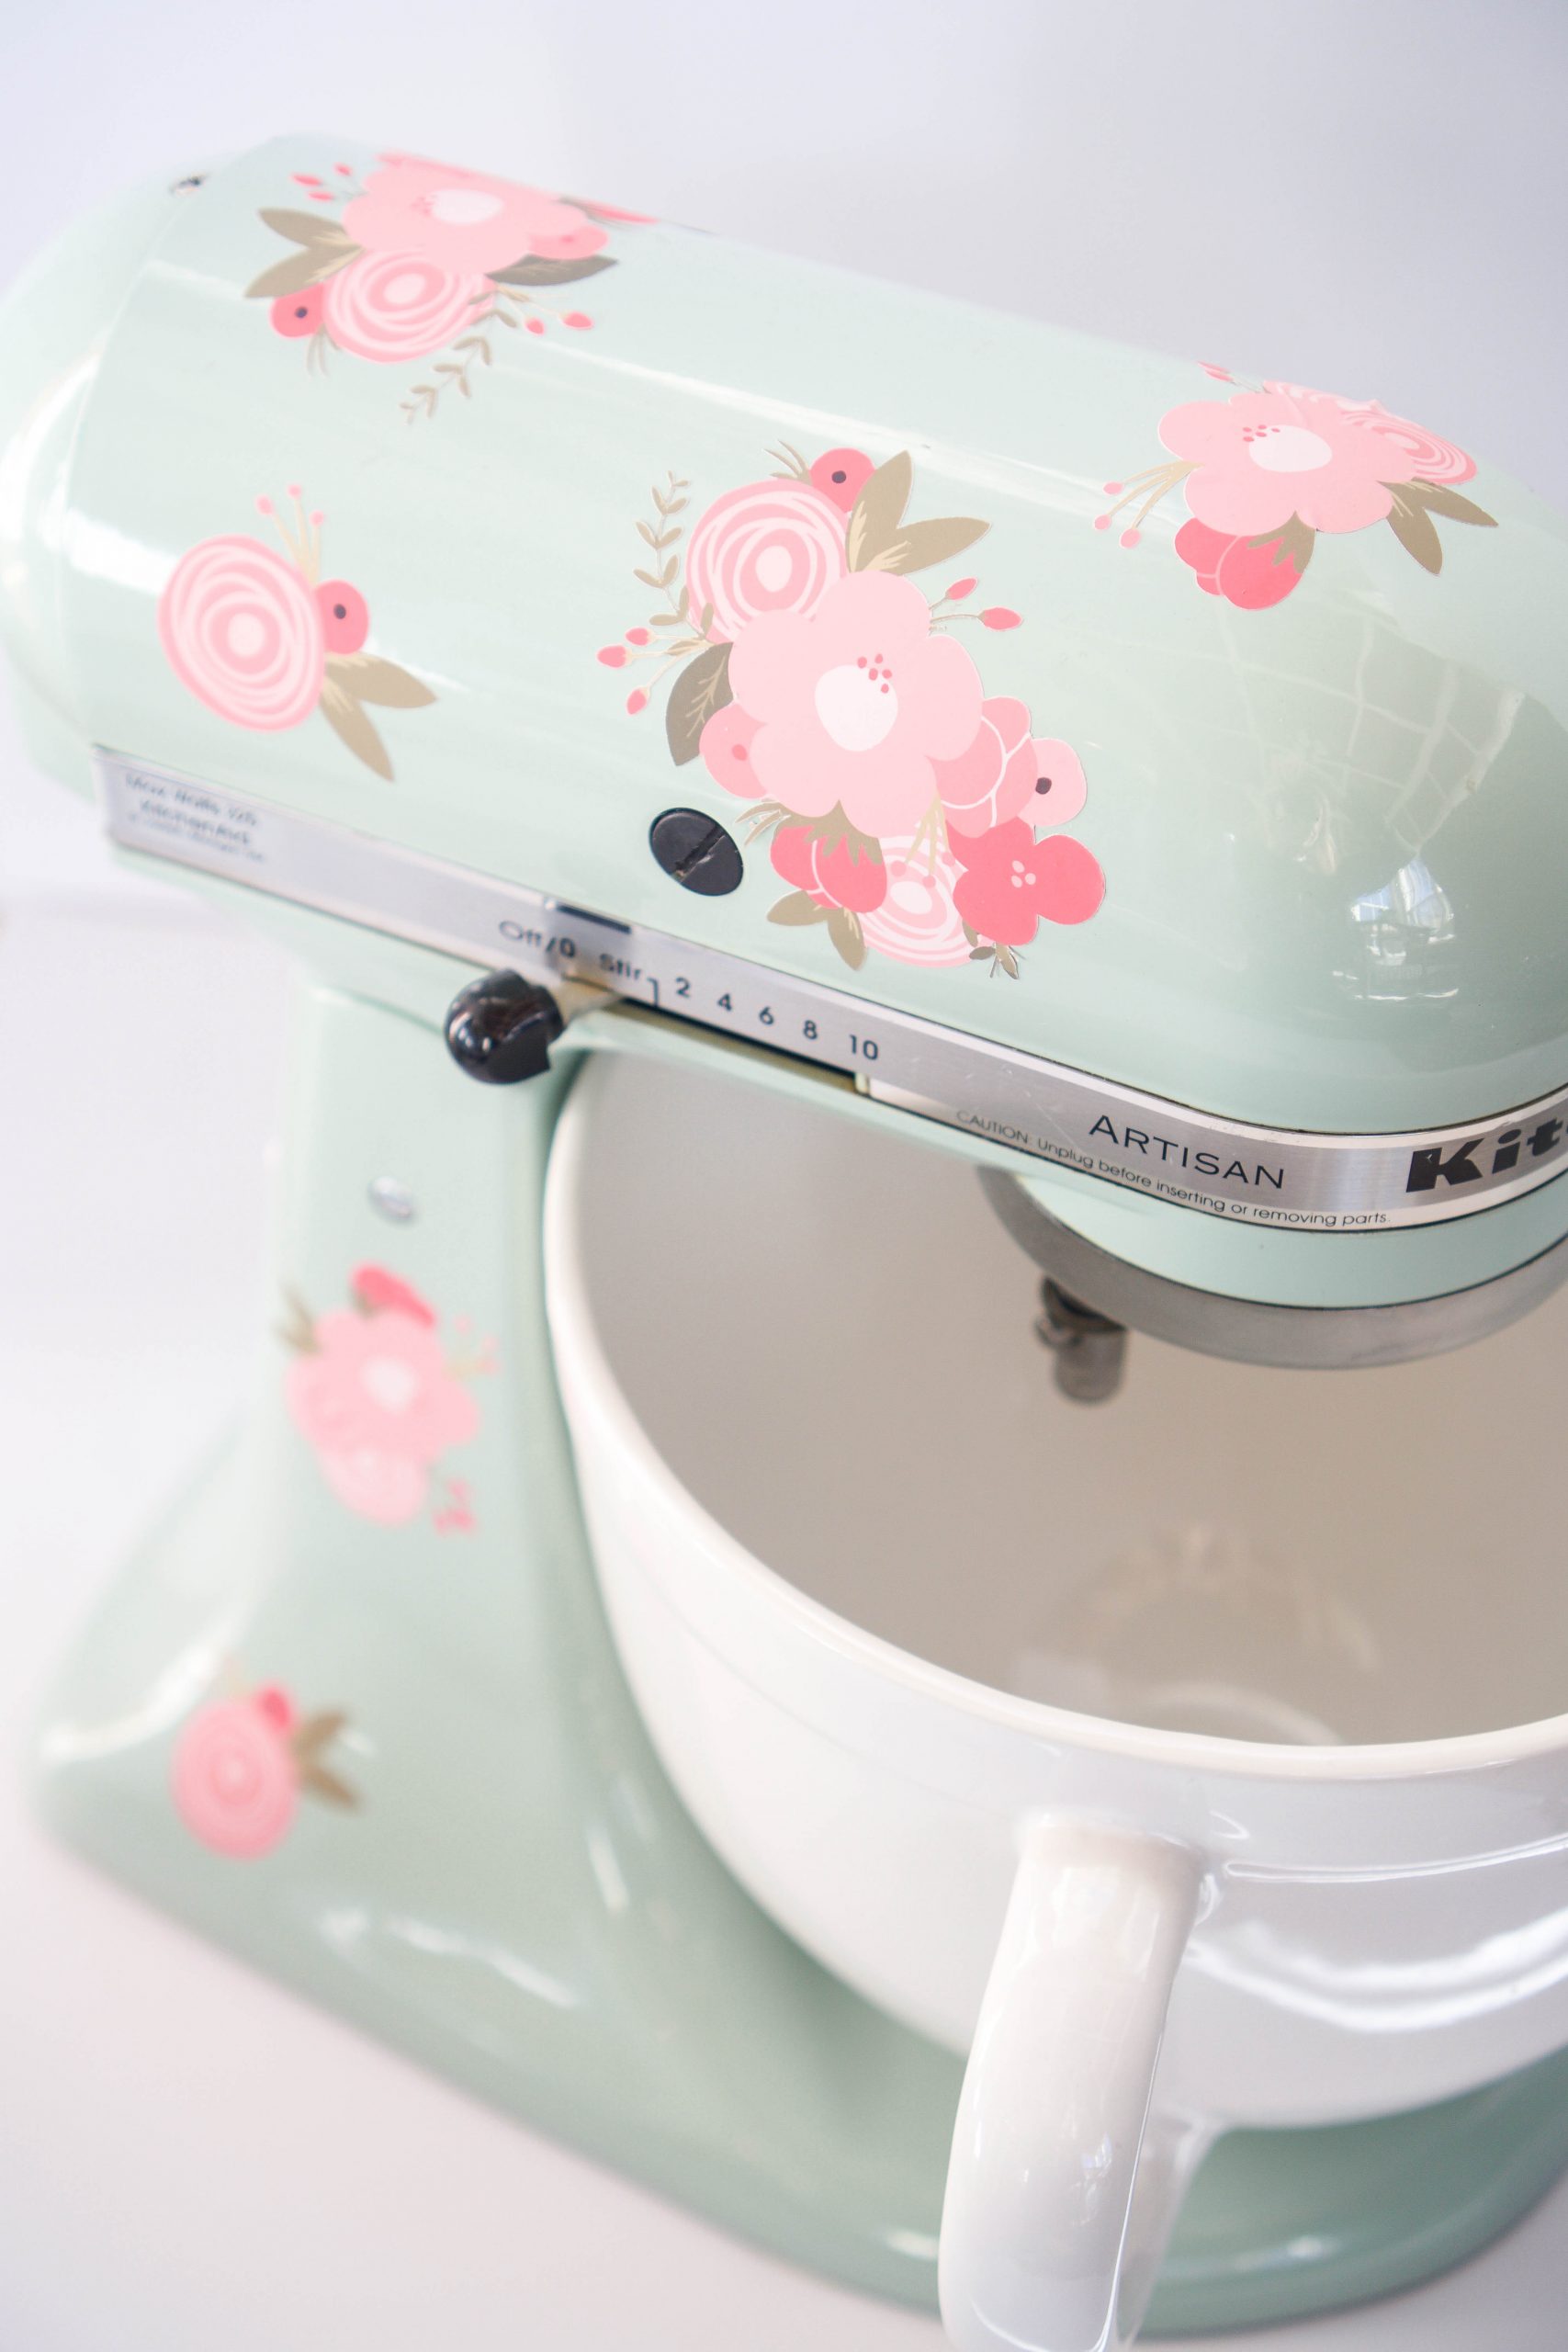

Hi, Cricut friends! I’ve received so many requests for this post over the past 3 years. When I first came up with the idea to add vinyl decals to my mixer, I was a Silhouette user. That led to me becoming a Silhouette blogger which eventually led me to Cricut! It’s funny how life works.
Anyway, I was VERY new to the blogging world when I wrote the original tutorial for this project and each and every time I read that post from years ago, I cringe. It was bad. So today I’m updating this post for Cricut users and hopefully it doesn’t suck. Ha!
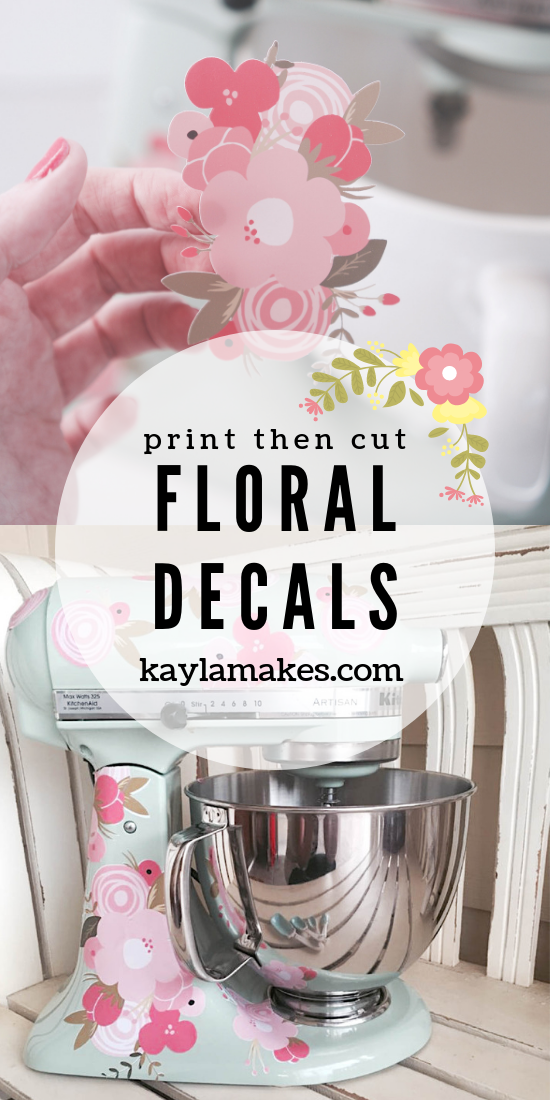

Here’s what you need:
- Printable Vinyl
- Printer
- Cricut Maker, Explore, Explore Air, Explore Air II (any Cricut machine)
- Spring Bouquet Files from the Silhouette Store
- Silhouette Studio (free to download and use)
To start, you’re going to need to go to the Silhouette Design Store and purchase the spring bouquet designs. That’s the only fair/legal way to do it. Amy is a fabulous Silhouette Designer and I strongly believe in paying artists for their hard work. Plus, they’re only .99 cents so for $3 you’ll have the exact flowers I used on my mixer.
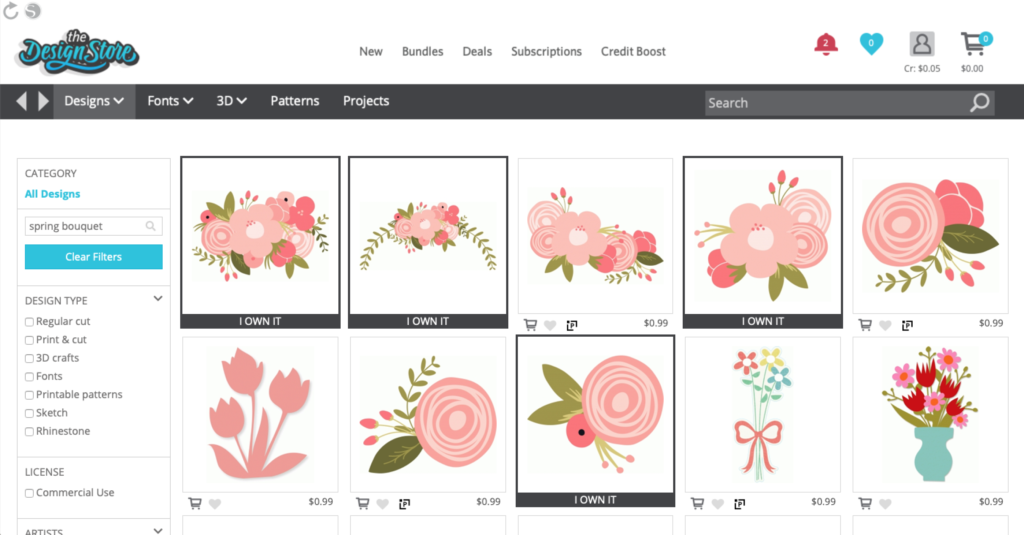

Next, head here and download the Silhouette Studio software so you can open and view the designs. Silhouette Studio is free to download, free to use and very user-friendly. You’ll only need to use it for a couple of minutes to open and view the designs.
Step One: Open, Ungroup and Screenshot Designs
The spring bouquet designs will be displayed with two options. One without a white border and one with a white border. Right click on the design and click ungroup to seperate the two then delete the one with the border as well as all of the text on the screen.
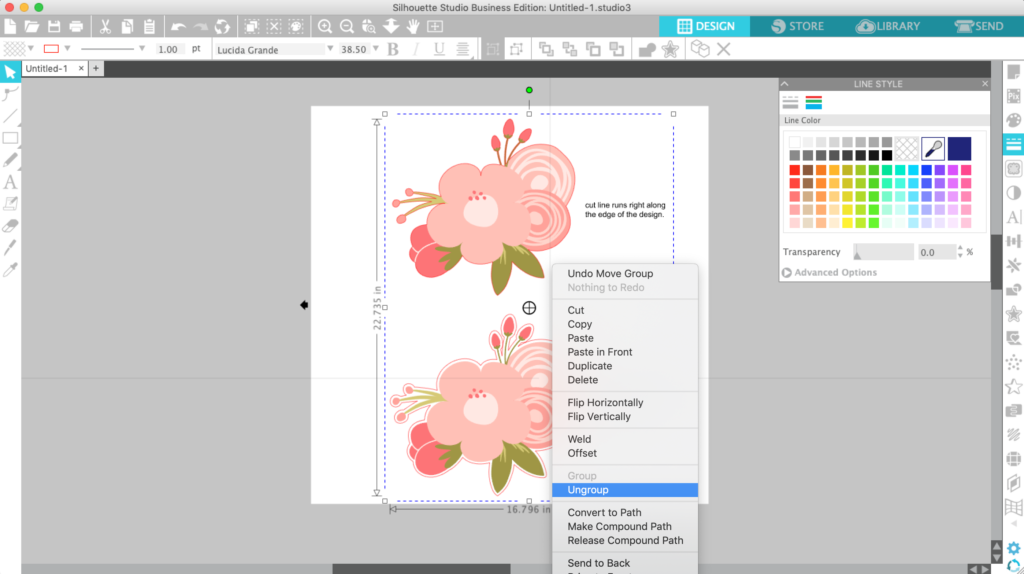

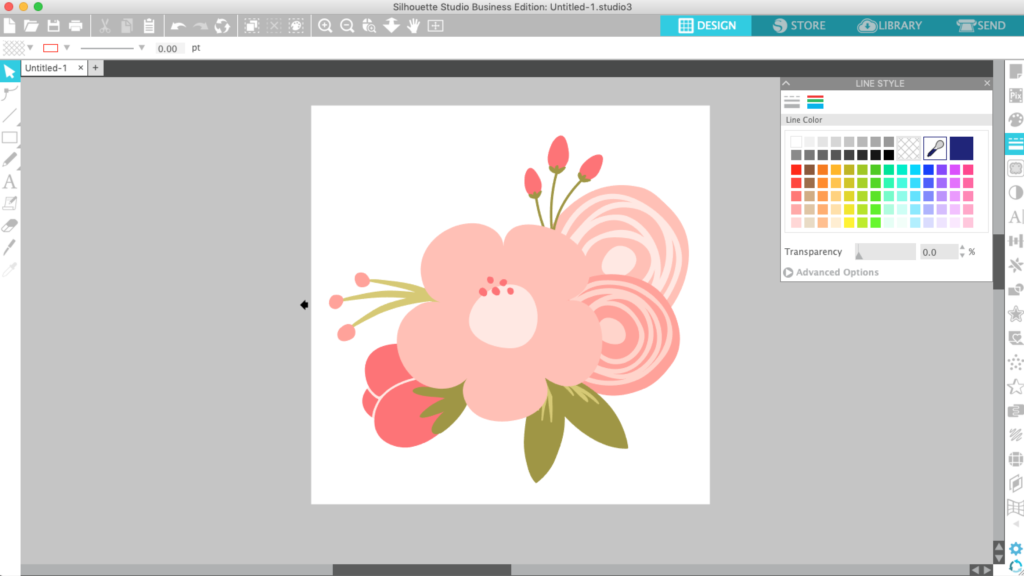
Next, click on the line style window (marked by the number 1 in the screenshot below) and make the red cut line transparent by clicking on line color (2) then clicking the white and grey grid (3).
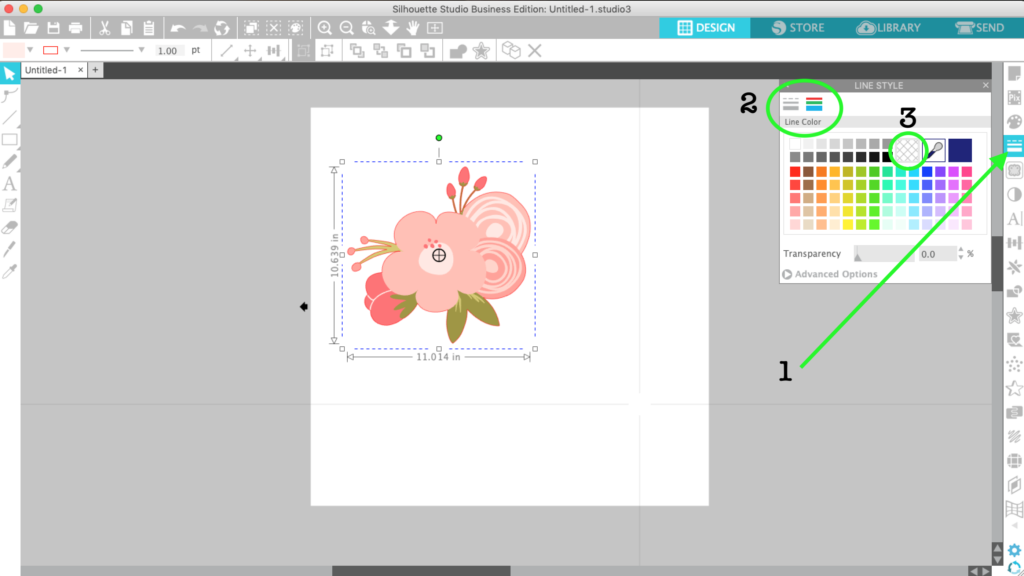

Enlarge the design so that it fills the space entirely and take a screenshot of the white background + design. On a Mac you can screenshot by pressing command+shift+4. If you’re a PC user, check google for instructions on how to take a screen capture on a PC.

Step Two: Upload Designs
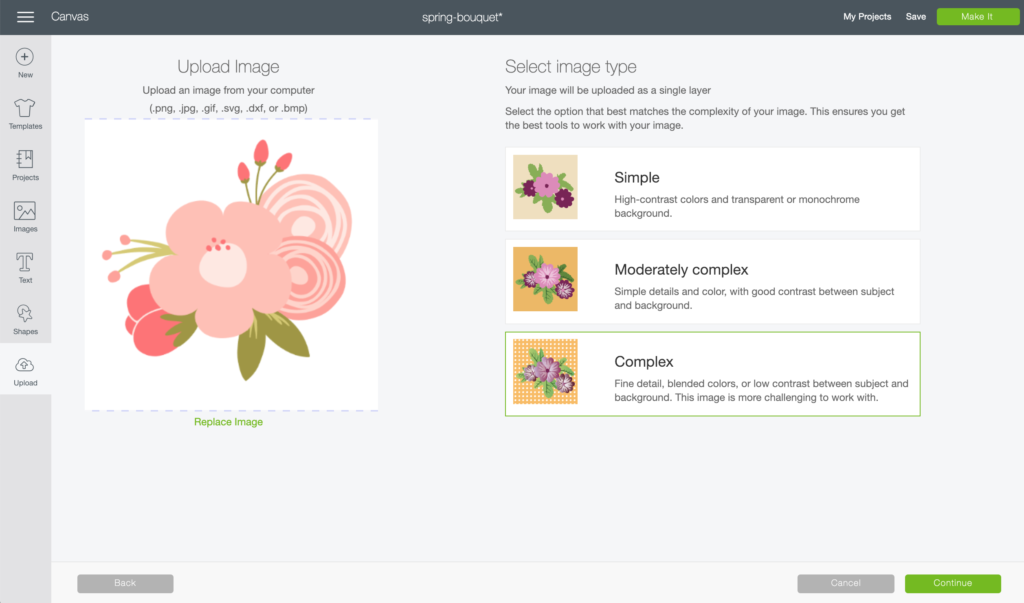
Now you can upload the screenshot into Design Space and clean up the image. Select Complex in the image type window to keep the fine details intact.

Use the tool to click and erase the white background, leaving just the flower visible.

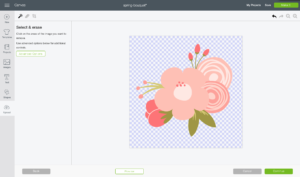

In the next window you will save your image as a print then cut image.
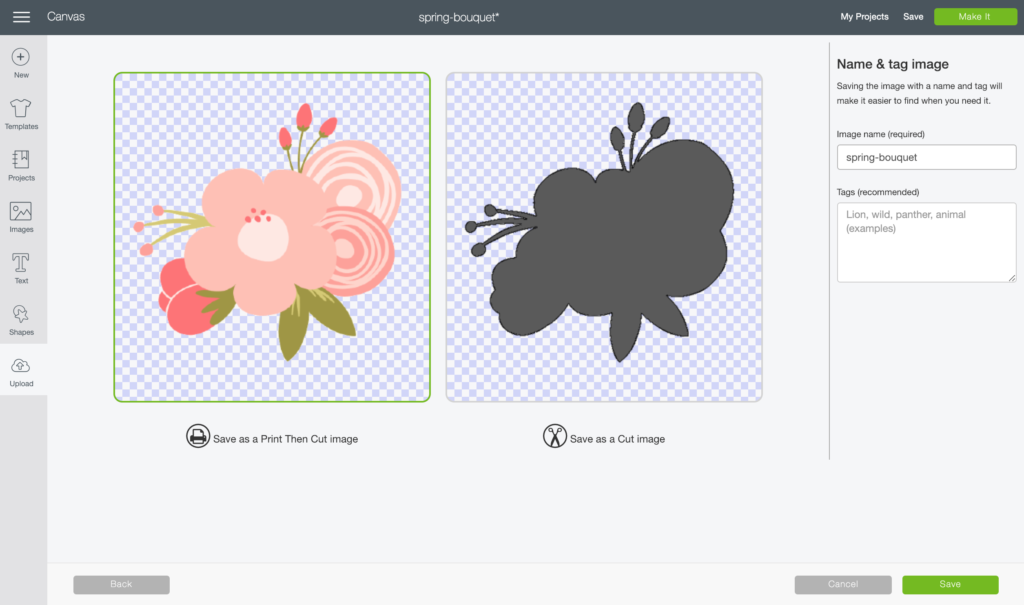

Step Three: Printing
Place all of the floral designs on the canvas and adjust the sizes.
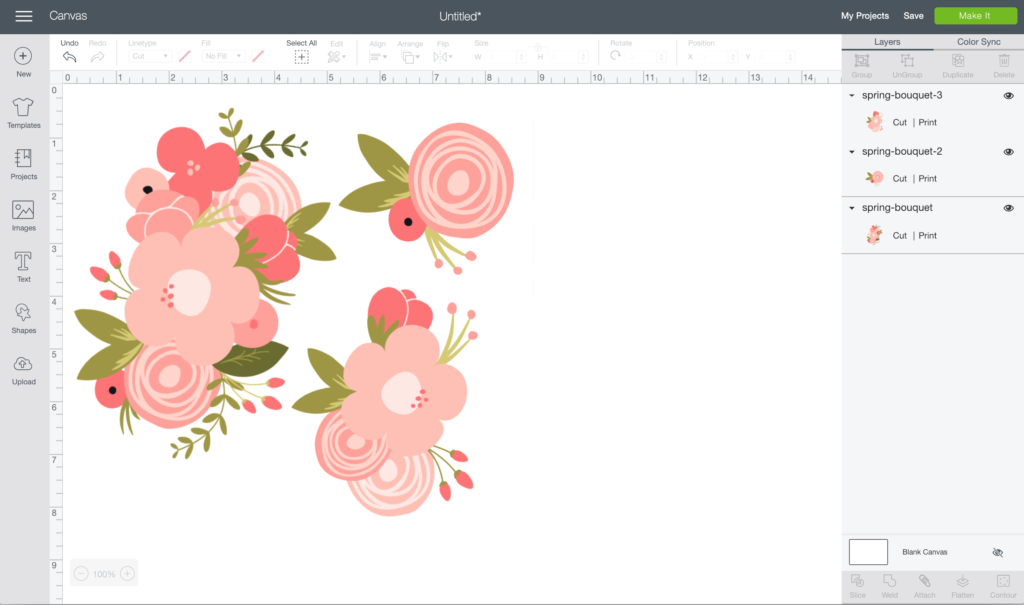

Click the Make It button and in the next window you will see the designs arranged on the mat surrounded by the registration box.
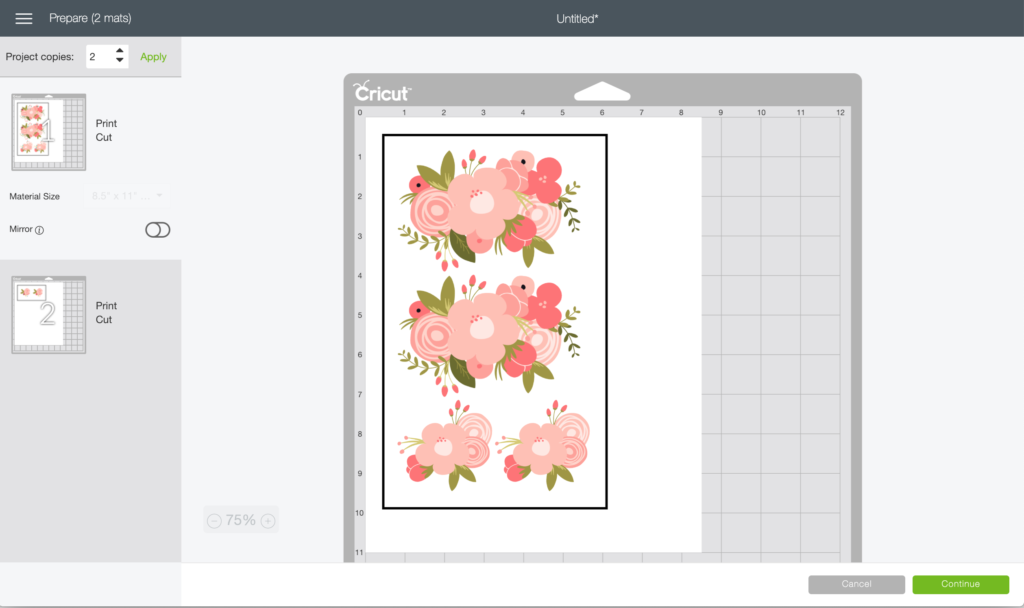

Click continue then select the printer you’re using.
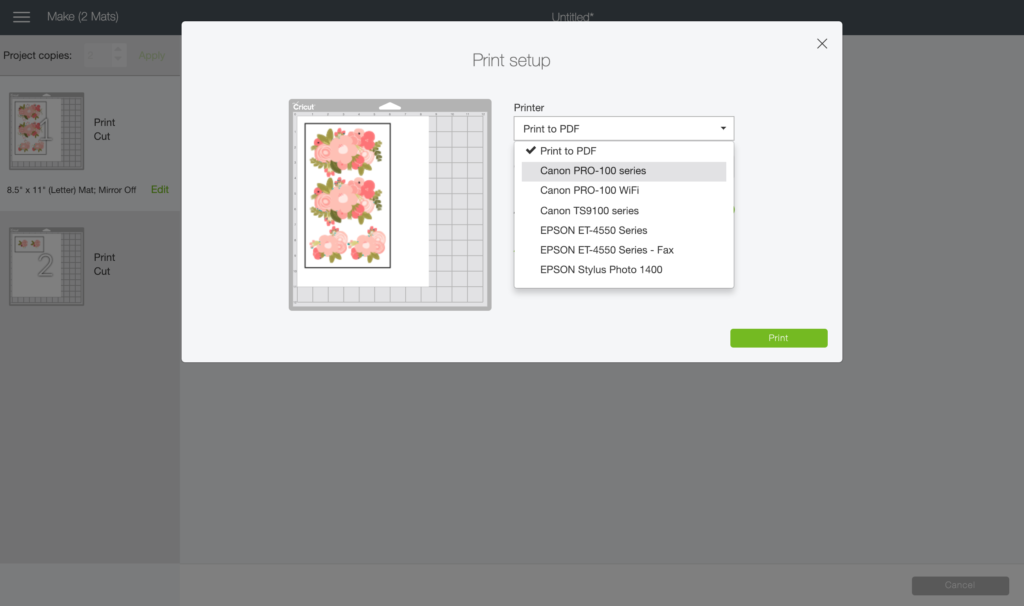

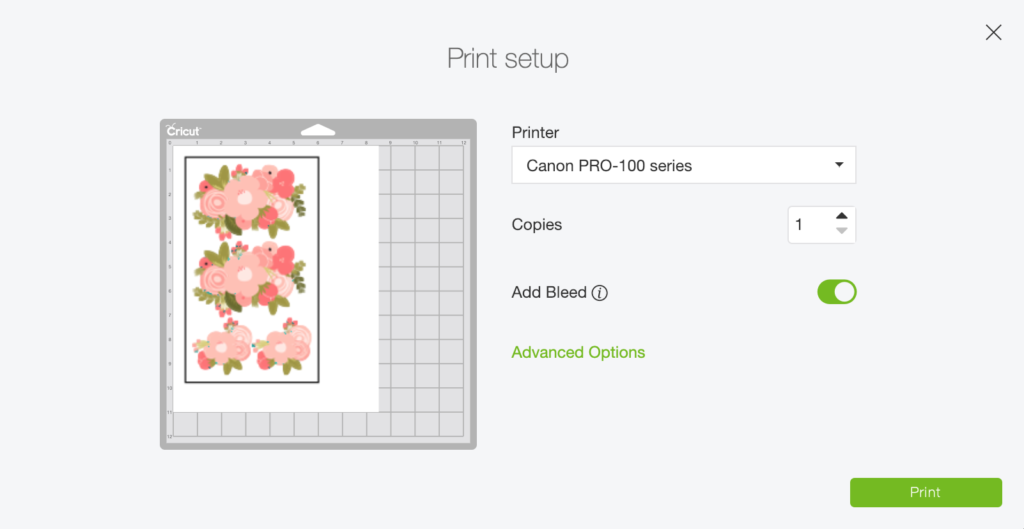
For cleaner printed designs, turn on the bleed option. Place the printable vinyl in the printer and click Print.

Step Four: Cutting
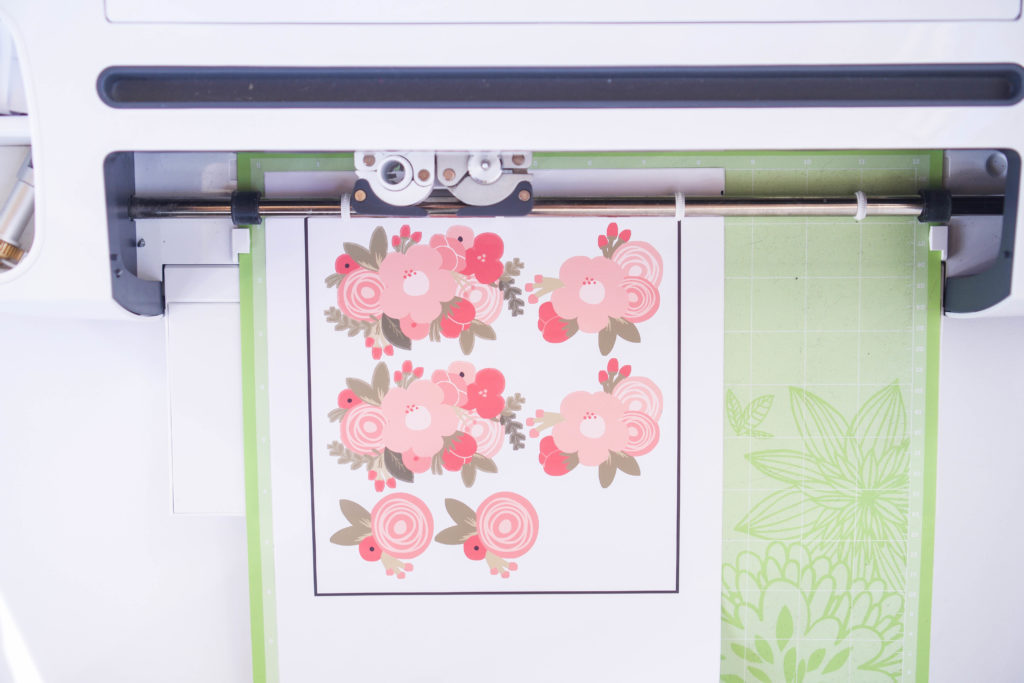
Place the printed sheet on the cutting mat with the designs facing up and load the cutting mat into the machine.

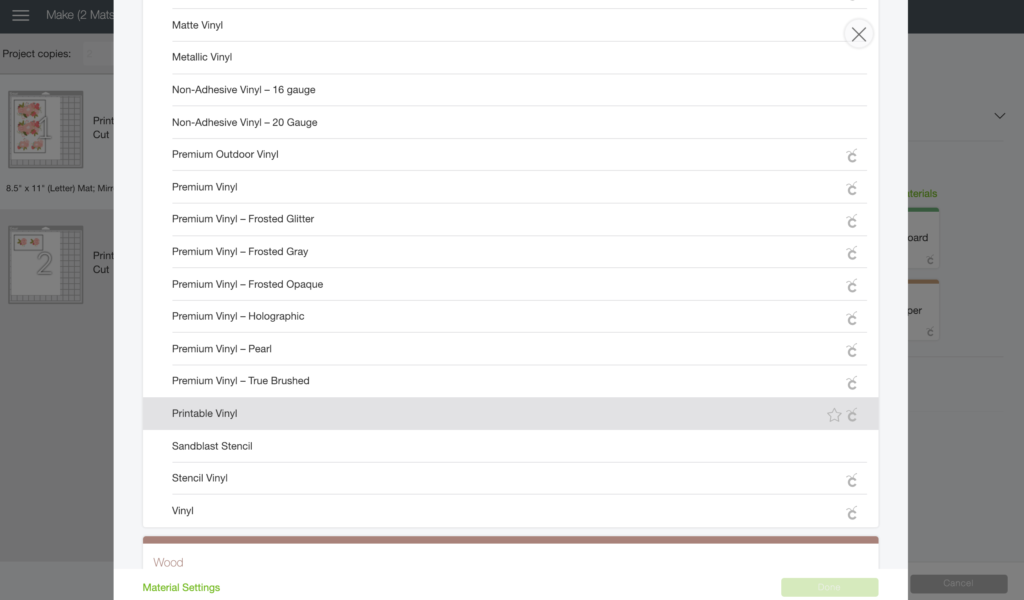
In the materials menu, select Vinyl then Printable Vinyl and click continue.

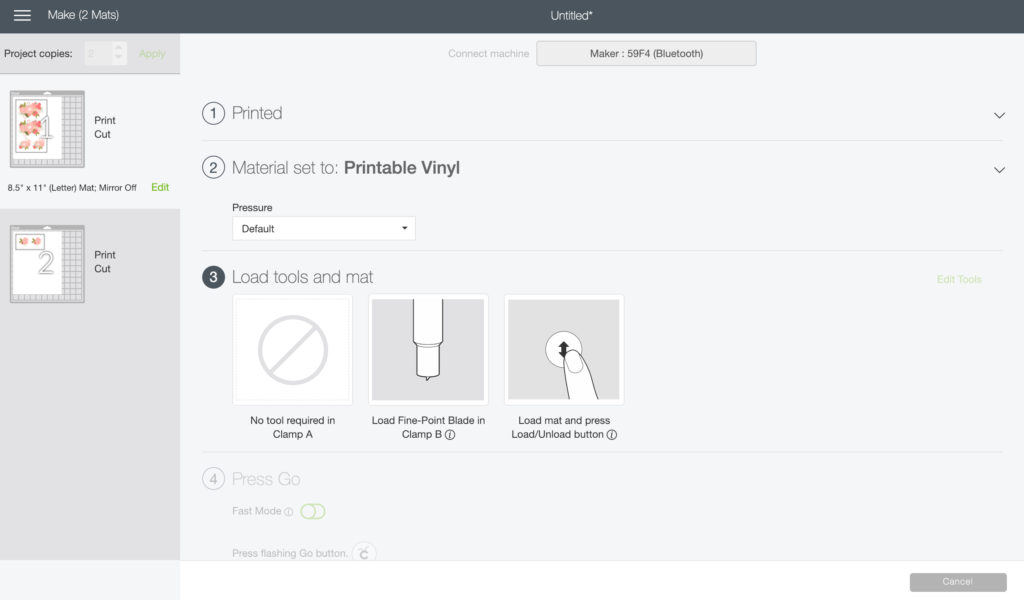

The machine will take a minute or so to read the registration box and then begin cutting. After cutting is complete, unload the mat and remove the excess vinyl. A weeding tool is very helpful in this step. There are a lot of little fragile pieces.
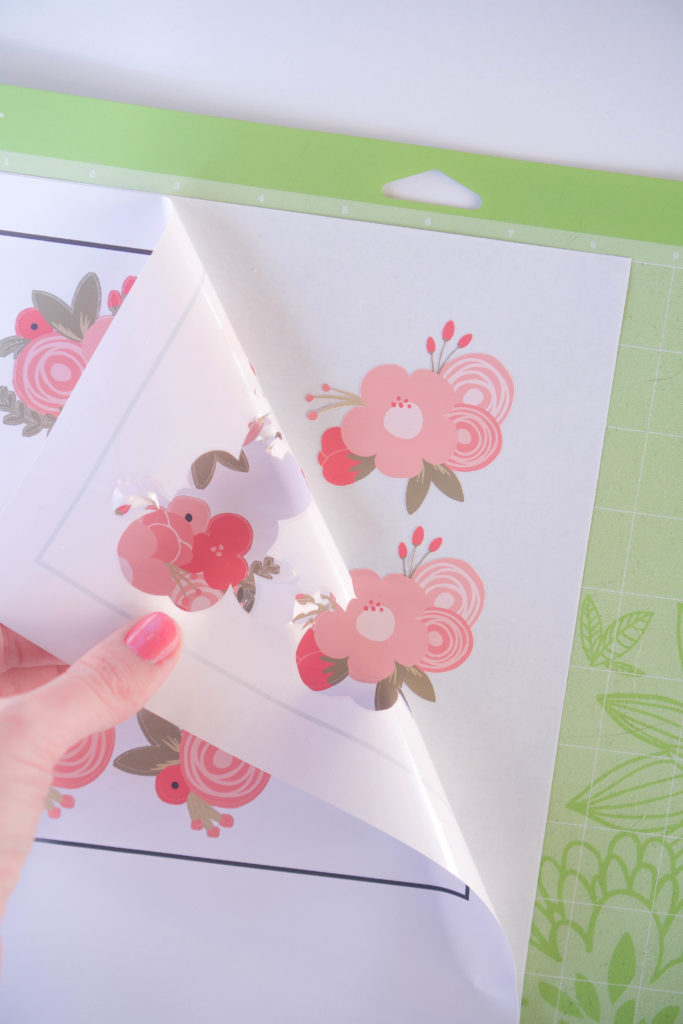

Step Five: Apply Decals
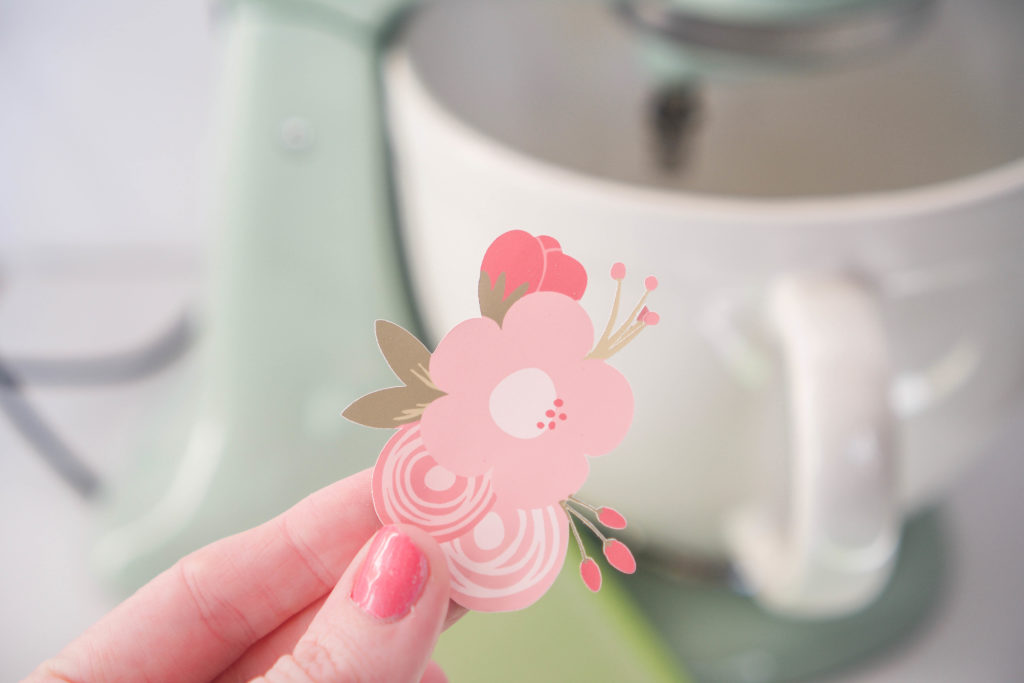
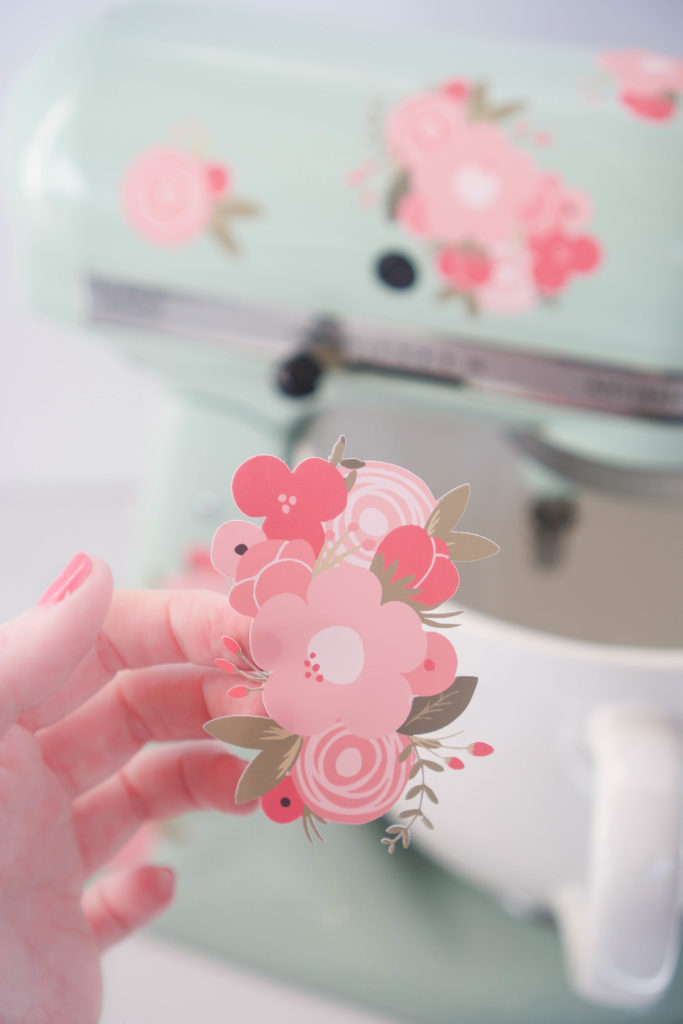
Carefully peel each decal off of the paper backing and apply it to the mixer. If you mess up and end up with a crease, just peel the decal off and reposition.


FAQ’s:
Is printable vinyl waterproof? Most brands are! The brand that I use is a high quality printable vinyl and not only is it waterproof but it withstands the dishwasher. I highly recommend it!
What about food stains like chocolate, butter etc.? Food stains are inevitable. The best way to protect the decals is to use a clear vinyl overlay like this one. Apply it to the printed sheet of UNCUT decals then cut the two layers at the same time.
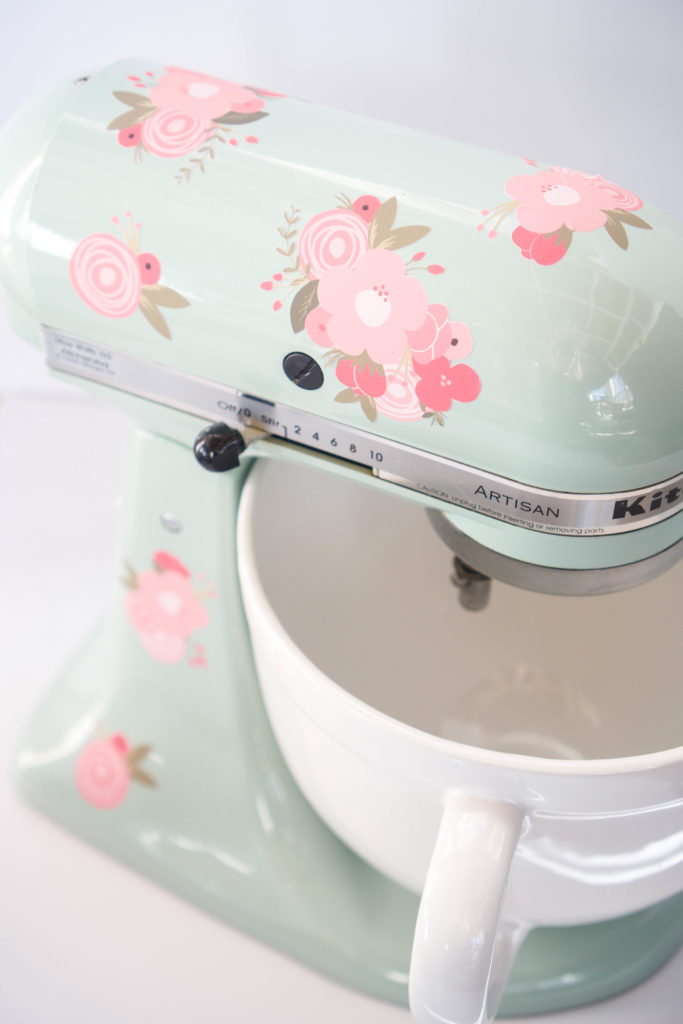
What size are your decals? On the original mixer which you can see at the top of the post, I did larger decals and that is the size that I prefer. The large bouquet is around 5.5 inches in length. Just play with the sizes until you find a look you love.
What color is your mixer? Pistachio! It’s a pretty minty blue. 🙂

I hope this updated post is helpful to my Cricut buddies! If you have any questions or need me to elaborate on a step please don’t hesitate to send me an email or leave a comment!




Sondra H
I’m in love!! What brand of printable vinyl are you using? The link just took me to the Cameo starter bundle. I’m desperate for some pretty watercolor flowers on my mixer now!!
Kayla
Hi, Sondra! I am so happy that you like my mixer! Thank you for letting me know about the link. I updated it so it should take you to the right place now. 🙂
Britney
Do you put anything over the printable vinyl in order to make it waterproof? Love how your mixer turned out 😍
Kayla
Yes! I used the premium vinyl laminate overlay from Expressions! You just layer it on top of your printable vinyl before you put it into the cutting machine! Thanks, I’m glad you like it! 🙂
Samantha
Is this thepremium vinyl laminate sheets?
Kayla
Yes ma’am, I used the vinyl laminate overlay on top of my printed design.
China
So cute
Kayla
thank you!! 🙂
Amy
How do you do the template for the keyboard?
Kayla
It was a lot of trial and error to get the right size for my Macbook Air. There doesn’t seem to be a template available anywhere. I can email you my template if that helps.
Debi
I couldn’t find the laminate sheets on the Expressions website…..
Kayla
Vinyl Laminate Overlay
Jessica
Hi! I was wondering would you be willing to make a set just lIke thoes for perchase? I am in love and so would like a set
Kayla
you can email me at kaylamb@me.com 🙂
Ida White
I really love you mixer. Thank you for the tutorial. Now I need to do my new red mixer. Do you recommend any sites where I can get pretty flowers for the red mixer?
Kayla
Thank you! I’m so glad you like it! Are you a Silhouette user?
Jessica Lourenco
Hi! Absolutely in love with this!!! What is the program you used for the designs?!
Kayla
Thanks! I used Silhouette Studio!
kim west
Cutest mixer EVER!
Kayla
thank you!!! 🙂
Elizabeth
Hi, Kayla! Awesome tutorial! Not sure if you watch her show, but your mixer reminds me of the hand painted mixers featured on Ree Drummond’s “The Pioneer Woman” on Food Network. I am a Silhouette user, but I have never used print and cut. Should I be able to change the color of the Amy Robinson designs within Silhouette Studio so that I can choose another color that better matches my kitchen and mixer? I love the designs – would just like to alter the color.
Thanks again for sharing! Your mixer looks just perfect! 🙂
Kayla
Thank you! Ree’s mixer was 100% my inspiration for this project! I have been crushing on it for years but didn’t want to chance ruining my mixer with paint so vinyl stickers were the perfect solution!
Unfortunately, you can’t alter the colors of this particular design. I bet you could find one in the design store that would work for you! The selection of florals is HUGE!
Jaime
This is awesome! Would the same vinyl method work for decals on muhs or tumblers? Would it stay and be (hand)washable??
Kayla
Hi, Jaime! The printable vinyl does not work well on anything that has to be washed. Even with the vinyl overlay you will still have some water seep underneath and cause the ink to bleed. 🙁 bummer, I know!
Elizabeth
Would there be a way for me to buy the design and transfer it over to Cricut? I really want to use the design, but unfortunately I have a Cricut instead!
April
I’m very familiar with the cricut design app. With cricut acsess they have these almost exact flowers free that are fully customizable in size in color. Using 8.5×11 clear Avery shipping labels ( weather resistant ) which holds up better to delicate cleaning design your florals print them on your inkjet printer and using the proper cutting setting peel and stick. The thinness of the label will help to avoid bubbling.
Kayla
I’m not sure, I’m not familiar with their software but Silhouette Studio files are SVG files.
Janet
Love the design! I am ordering the supplies to make this next week. Do you know if I could use the same design sizes and measurement for my Silhouette Portrait? I am a newbie using my Silhouette and don’t want to make a mistake with one of my first projects. I want to give this a try but not sure how to convert the size for Portrait. Thank you for your help!
Kayla
Hi Janet, I hope I’m not to late to help you out! You can totally use the same design and sizes on your portrait, you would just put less on each sheet so that you end up with two sheets of decals instead of just one. Does that make sense?
Jessica
Hi! This is so gorgeous. I am in love. How have your pretty little flowers held up? I use my mixer frequently & usually make a mess of it and it needs a good wiping down afterwards. I dont spray it with anything usually, but wipe down/scrub with a damp cloth.
Kayla
Thank you!! They have help up so well! They honestly still look the exact same as the day I put them on. They are covered with a clear vinyl overlay so it protects them from spills. I normally just end up with flower all over the place and thats easy to wipe away!
Emily Roberts
I stumbled across your website looking for decals to buy for my Mom’s new Pistachio Kitchenaid Mixer. Do you sell these flower cutouts? She loved yours and would like to purchase some. My email address is aubybaby720@gmail.com, I would love to hear from you.
Desiree'
Hello! I am in LOVE with these flower! I have the same color mixer and was wondering if you could make the flowers for me?? If so what would you charge? Please email me mdmeyer4u@hotmail.com
Lisa Harrelson
I purchased this but need it in SVG format for the cricut. Is there any way to get that emailed to me?
Becky Peterosn
Hey Lisa Harrelson did you ever get a SVG . .That is what I am looking for ??
kim Meyer
Hello, this is a great tutorial and i’m excited to try it but i’m curious if you are selling the template for the keyboard? I am very interested in trying to make one of those!
Lauren
What color is this mixer? I love this and want one with similar vinyl on it! 🙂
Ashley
What color is your mixer please? I love it!
Kayla
Hi there! It’s the Pistachio color!
Sarihas
Hi! I would love to get a file of your flowers for my kitchenaid. Here’s my email salihakop@gmail.com
christina
can i get the file for the flowers please? love love love this!! christina.tingle@gmail.com we have a silhouette cameo 3
Katrina
Omg where did you find the flowers?! I have the printable vinyl but been so scared to use it lol I want to try doing this to my white mixer! Second on the list is the keyboard for my iMac. Do you have a tutorial and template for that also?
Kayla
Hey! The flowers are from the Silhouette Design store! Just search for spring floral. The keyboard decal was so difficult! I tried to develop a template but couldn’t get it to work. 🙁
Kay
Hi Kayla, If the design I choose does not give me the two different options, of with or without margins around the flowers, how can I print it with no margins? The ones I printed all have the white border around them and they look like stickers and not hand painted. Thanks so much. PS I did purchase your design, also, and I LOVE how they look with no margins.
bridget
Love this print and as stated by others above, would you be willing to make these and sell? Do you have other prints too? Thank you!!